
Arjun
Mumbai → Toronto
"How hard can opening a bank account be?"
VS

Priya
Delhi → Toronto
"I already know which bank, which branch, and what to bring."
Two characters. Same city. Same goal. Day 3.
Arjun
Mumbai → Toronto
"How hard can opening a bank account be?"
Priya
Delhi → Toronto
"I already know which bank, which branch, and what to bring."
Two characters. Same city. Same goal. Day 3.
Day 3 in Canada.
The jet lag is mostly gone. The excitement hasn't fully worn off yet. Both Arjun and Priya have one critical task on their Day 3 list — open a Canadian bank account.
Without a bank account, you can't access your GIC funds. You can't set up direct deposit for your part-time job. You can't pay rent by e-transfer. You can't build credit. You're essentially invisible to the Canadian financial system.
This is not optional. This is Day 3.
💡 Before You Go to the Bank — You Need These Two Things
Before you walk into any bank branch, make sure you have these ready:
1. A Canadian phone number
You need an active Canadian phone number to open your account and set up online banking. The bank will send your one-time verification codes (OTP) to this number from Day 2. Without it, you cannot complete the setup at the branch.
This is why sorting your SIM card before your bank appointment is the right order of operations. If you haven't sorted your phone plan yet — do that first.
2. Your Social Insurance Number (SIN)
You need your SIN to apply for a credit card at the same appointment. Without it, the banker cannot run your credit application and you will have to come back a second time just for the card.
Get your SIN at any Service Canada office — it is free and takes about 20–30 minutes with your passport and study permit. Do this on Day 2 before your bank appointment on Day 3.
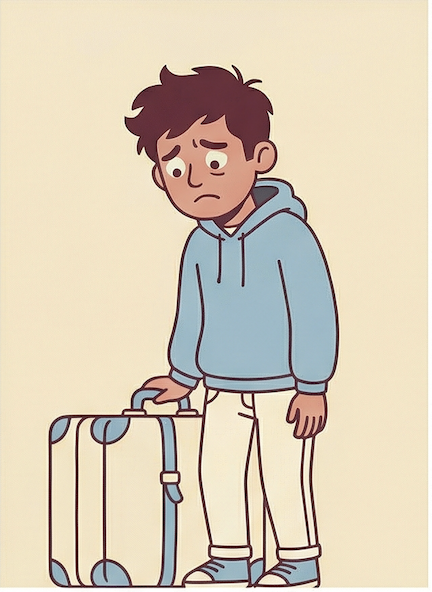
🧳 Chapter One
Arjun's Story
Mumbai → Toronto
"How hard can opening a bank account be?"
Arjun wakes up at 9am, showers, and decides to head to the nearest branch of whichever bank his education agent picked for his GIC. He doesn't know what documents to bring. He doesn't know an appointment is needed. He figures — it's a bank. How hard can it be?
He walks past a TD and a Scotiabank on the same street. His agent set up the GIC with CIBC, so he walks in.
He approaches the front desk.
"Hi, I'd like to activate my GIC account."
The teller smiles. "Of course. Do you have an appointment?"
Arjun does not have an appointment.
The next available slot is in two days.
He walks back out into the cold.
Strike one.
He books the appointment for two days later — frustrated, but he has no choice. He doesn't think to ask what documents to bring.
Two days later, he shows up to his CIBC appointment. He sits down across from the banker.
"Can I see your passport, your study permit, and your proof of address?"
Arjun has his passport. He has his study permit.
Proof of address?
He's been in Canada for two days. He's staying with a friend. He has no utility bill, no lease agreement, nothing with his name on a Canadian address.
"I'm sorry, we can't open the account without proof of address," the banker says gently.
Arjun stares at the table.
Strike two.
He goes home. He is not stupid — he just didn't know what to ask. He calls his friend's landlord that evening and explains the situation. The landlord emails him a letter confirming his address. He prints it at the university library the next morning for $0.25 a page.
He walks back into the CIBC branch the next morning without an appointment and waits 45 minutes. This time, everything is in order. The banker opens his chequing account and savings account — both $0 monthly fee as a student.
The banker then suggests a credit card to start building his Canadian credit history. Smart advice. Two options are on the table:
Option 1: A newcomer Visa card. $0 annual fee forever. Lower cashback and basic perks.
Option 2: A premium Visa card. $0 for Year 1, then $129 per year. Higher cashback, travel benefits, and better-looking card.
Arjun picks Option 2. It looks more impressive. He doesn't think about Month 13.
He walks out with a debit card and a credit card he doesn't fully understand yet.
Total time from "I want a bank account" to "I have a bank account": 5 days.
"Five days. But I got there."
— Arjun, Day 5, CIBC Branch

⚠️ What Arjun Should Have Done
💡 What Counts as Proof of Address?
This trips up almost every new arrival. You need a document with your name at a Canadian address. Any of these works:
Print a copy. Don't show it on your phone. Banks want paper.
💡 The Annual Fee Trap
Arjun's premium card is $0 for Year 1. On Month 13, $129 gets charged automatically. Most students forget. At that point you have three options:
Priya's no-fee card? She will never face this decision.
Your first credit card in Canada should be free forever. You can always upgrade to a premium card in Year 2 or 3 once you understand what benefits you actually use.
💡 The Newcomer Account — Ask for It
Every major Canadian bank has a newcomer or student account with fully waived monthly fees. But they don't always offer it automatically — you have to ask.
If you walk in and just say "I want to open an account," they may open a regular chequing account with a monthly fee of $10.95–$16.95.
Walk in and say: "I'm an international student and I'd like to activate my GIC account with no monthly fees on both chequing and savings."
That one sentence saves you ~$150–200 per year.
Same for your savings account — make sure it is $0 monthly fee with no minimum balance requirement. Not "$0 if you maintain $3,000." 100% free, no conditions.
🌟 Chapter Two
Priya's Story
Delhi → Toronto
"I already know which bank, which branch, and what to bring."
Priya opens her StudenzBit Day 3 checklist at 8am.
Task 1: Bank account. Scotiabank. Bloor Street branch. 10am appointment.
She booked it online two weeks ago from Delhi — while going through the StudenzBit arrival checklist. It took five minutes. She picked "New Customer" on the branch booking page, selected "Open a new account," filled in her details, and confirmed.
She also noted exactly what to bring:
Passport ✓
Study permit ✓
Letter of Acceptance from her university (showing her campus address) ✓
Canadian phone number ✓
Social Insurance Number (SIN) ✓
She walks into the Scotiabank branch at 9:58am.
The banker takes her through the account setup — a chequing account and savings account, both with $0 monthly fees for students, a debit card, and then presents two credit card options.
Priya asks about the $0 annual fee card immediately. Not the $0-for-year-1 card. She'd read about the difference the night before.
The banker runs a soft credit check. She's approved for a $500 limit on the Scotia Scene+ Visa — a newcomer-friendly card with no annual fee, ever.
Priya walks out at 10:41am.
She finds a café nearby, orders a coffee, and spends 20 minutes setting up the Scotiabank app — enabling notifications, setting up two-step verification, and saving her account details to her master document.
By 11:15am, Task 1 is done.
She is already building her Canadian credit score. Arjun won't start for another few days.
"No annual fee. Forever. That's the one."
— Priya, Scotiabank branch, 10:28am

✅ Priya's Tips
Open your bank account on Day 2 or Day 3 — not Day 7 or later. Every day without a Canadian bank account is a day you are not building credit history and a day your GIC funds are sitting inaccessible.
Three years from now, when you apply for a credit card upgrade, a car loan, or an apartment without a co-signer — that credit history is what determines whether you qualify.
Get a credit card at the same appointment, even if you don't plan to use it much. A $500 newcomer Visa, used for small purchases and paid off in full every month, will put you at a 700–750+ credit score by the end of Year 1. The two rules: pay the full balance every month, and keep your spending under 30% of the limit.
| Metric | 🧳 Arjun | 🌟 Priya |
|---|---|---|
| Time from first walk-in to active account | 5 days | ✓ ~43 minutes |
| Appointment | Walked in — sent away, then booked late | ✓ Booked from Delhi |
| Proof of address | Not ready — second trip | ✓ LOA with campus address |
| First credit card | Premium — $129 from Year 2 | ✓ No annual fee, ever |
| Credit history clock | Starts late | ✓ Same morning |
| Branch visits after Day 3 | Several | One |
| Overall experience | Costly detours | ✓ One-and-done |
Opening a bank account in Canada is a process — not a favour. Branches are busy, rules are strict, and the default sales path is not always the cheapest one for students.
Arjun did everything eventually. He just paid for it in time, stress, and a credit-card choice he may regret in Month 13.
Priya didn't get a better banker. She got a better checklist.
Here's what to take away from Day 3:
💡 Choose Your GIC Bank Wisely — Think Physical Branches First
Your GIC bank is usually chosen by your education agent in India — not by you. That's fine, but before they finalise it, tell them one thing: choose a bank with physical branches.
CIBC and Scotiabank have branches in almost every Canadian city. You can walk in, sit down with a real banker, and get your questions answered face to face.
Simplii Financial — which is CIBC's online-only arm — has no physical branches. Everything is done by phone or online. For a newcomer who is still learning how Canadian banking works, that can be frustrating and stressful when something goes wrong.
Our pick: CIBC or Scotiabank. Both have strong newcomer programs, physical branches across Canada, and staff who are experienced with international student accounts.
💡 Skip the Cheque Book — You Won't Need It
In India, cheques are used regularly for rent, fees, and transfers. In Canada, almost nobody uses them in day-to-day student life.
Cheque books in Canada are not free — banks charge for them. And as a student, you will almost never need one. Rent is paid by Interac e-Transfer. Tuition is paid online through your student portal. Bills are set up by direct debit.
Save the money. If you ever do need a cheque (very rare), your bank can issue a single certified cheque on the spot for a small fee.
Do not let the banker upsell you a cheque book on Day 3. You do not need it.
What Happens Next?
Bare floor. Empty shelf. Two carts — and one mattress mistake that shows up on Week 3.
Day 4: mattress, kitchen & your first grocery shop — what to buy, where, and what not to cheap out on.
Read Day 4 →